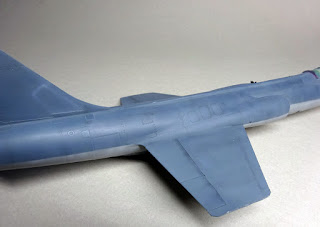
Some pictures of my current build: Eduard's boxing of Hasegawa's F-104G 1/48.
Martin Baker GQ-7A bang seat
Finished cockpit
An inspirational build that obsessed me for a while and published in Air Fan N°136 in the 90s:
Comparison of Haseg and DACO wings
Masking of the air intakes:
I tried to fill the horrible rivets with MrSurfacer & Deluxe Perfect Putty but the result was far from "perfect". I had to finish the job with CA glue:
1- Helped by Dymo tape, I use a needle to re-scribe straight lines
2 - The same needle is used to re-scribe rivets
3 - The line running around the nose cone is done helped using a circle template
4 - For a perfect work, I use a bit of Tamiya cement to blend all imperfections
5 - When the cement is dry, fine steel wool is used to smooth the surface
6 - Finally, I use black pigments mixed with water to see if I did a good job (or not...)
Martin Baker GQ-7A bang seat
Finished cockpit
An inspirational build that obsessed me for a while and published in Air Fan N°136 in the 90s:
Comparison of Haseg and DACO wings
Masking of the air intakes:
I tried to fill the horrible rivets with MrSurfacer & Deluxe Perfect Putty but the result was far from "perfect". I had to finish the job with CA glue:
Re-scribing of the nose details: A 6-steps tutorial
1- Helped by Dymo tape, I use a needle to re-scribe straight lines
2 - The same needle is used to re-scribe rivets
3 - The line running around the nose cone is done helped using a circle template
4 - For a perfect work, I use a bit of Tamiya cement to blend all imperfections
5 - When the cement is dry, fine steel wool is used to smooth the surface
6 - Finally, I use black pigments mixed with water to see if I did a good job (or not...)


Comments
Post a Comment